How to Create a Branded Gmail Signature with Google Docs
Click here to skip the text and watch the video tutorial instead.
I’m sure you’ve seen emails hit your inbox and you can’t help but notice that the sender has a professionally designed email signature complete with a logo or headshot, social media icons, and various other information like a link to their opt-in, website, or other pertinent information.
Elements like email signatures may seem like a lower priority when it comes to all the different tasks that are on your plate when running a business, but attention to detail in these smaller elements of your visual brand identity will help your brand stand out among the rest.
I’ve had numerous clients ask me how they can get an email signature like mine so today on the blog I’m going to walk you through exactly how to do that in 4 simple steps. It shouldn’t take you more than 30 minutes to have an email signature set up in Gmail that looks like it was designed by a professional graphic designer.
STEP 1: Gather your assets
Before we start actually creating your Gmail signature, you’ll want to gather the assets you are going to use in your signature. Your assets will be your headshot, logo, social media icons, and any other graphics you are using that aren’t text. Do you want to use a photo of yourself or your logo, or maybe both? I choose to use an image of myself instead of my logo so that the people I’m communicating with can put a face to my name. It’s totally up to you to decide what images you want to use, but keep in mind that less is more when it comes to how much to include in your signature. You don’t want to overwhelm others with an extremely busy signature full of text and images. Choose what’s most important to your business success and stick with that.
You’ll also want to make sure these are sized appropriately as well. You can adjust the size in Google Docs, but you’ll want to start out with images that are close to the final size you’ll use. I recommend sizing logos and headshots at roughly 200x200 pixels, and social media icons around 50x50 pixels. It’s best to err on having your images too large versus too small so that you don’t run into any pixelation issues.
STEP 2: Create a new Google Doc
This step is simple. All you need to do is create a new Google document for your email signature. Simply head to your Google Drive, click “New”, and choose Google Docs. Name your new document something recognizable like your business name + email signature.
STEP 3: Design your email signature
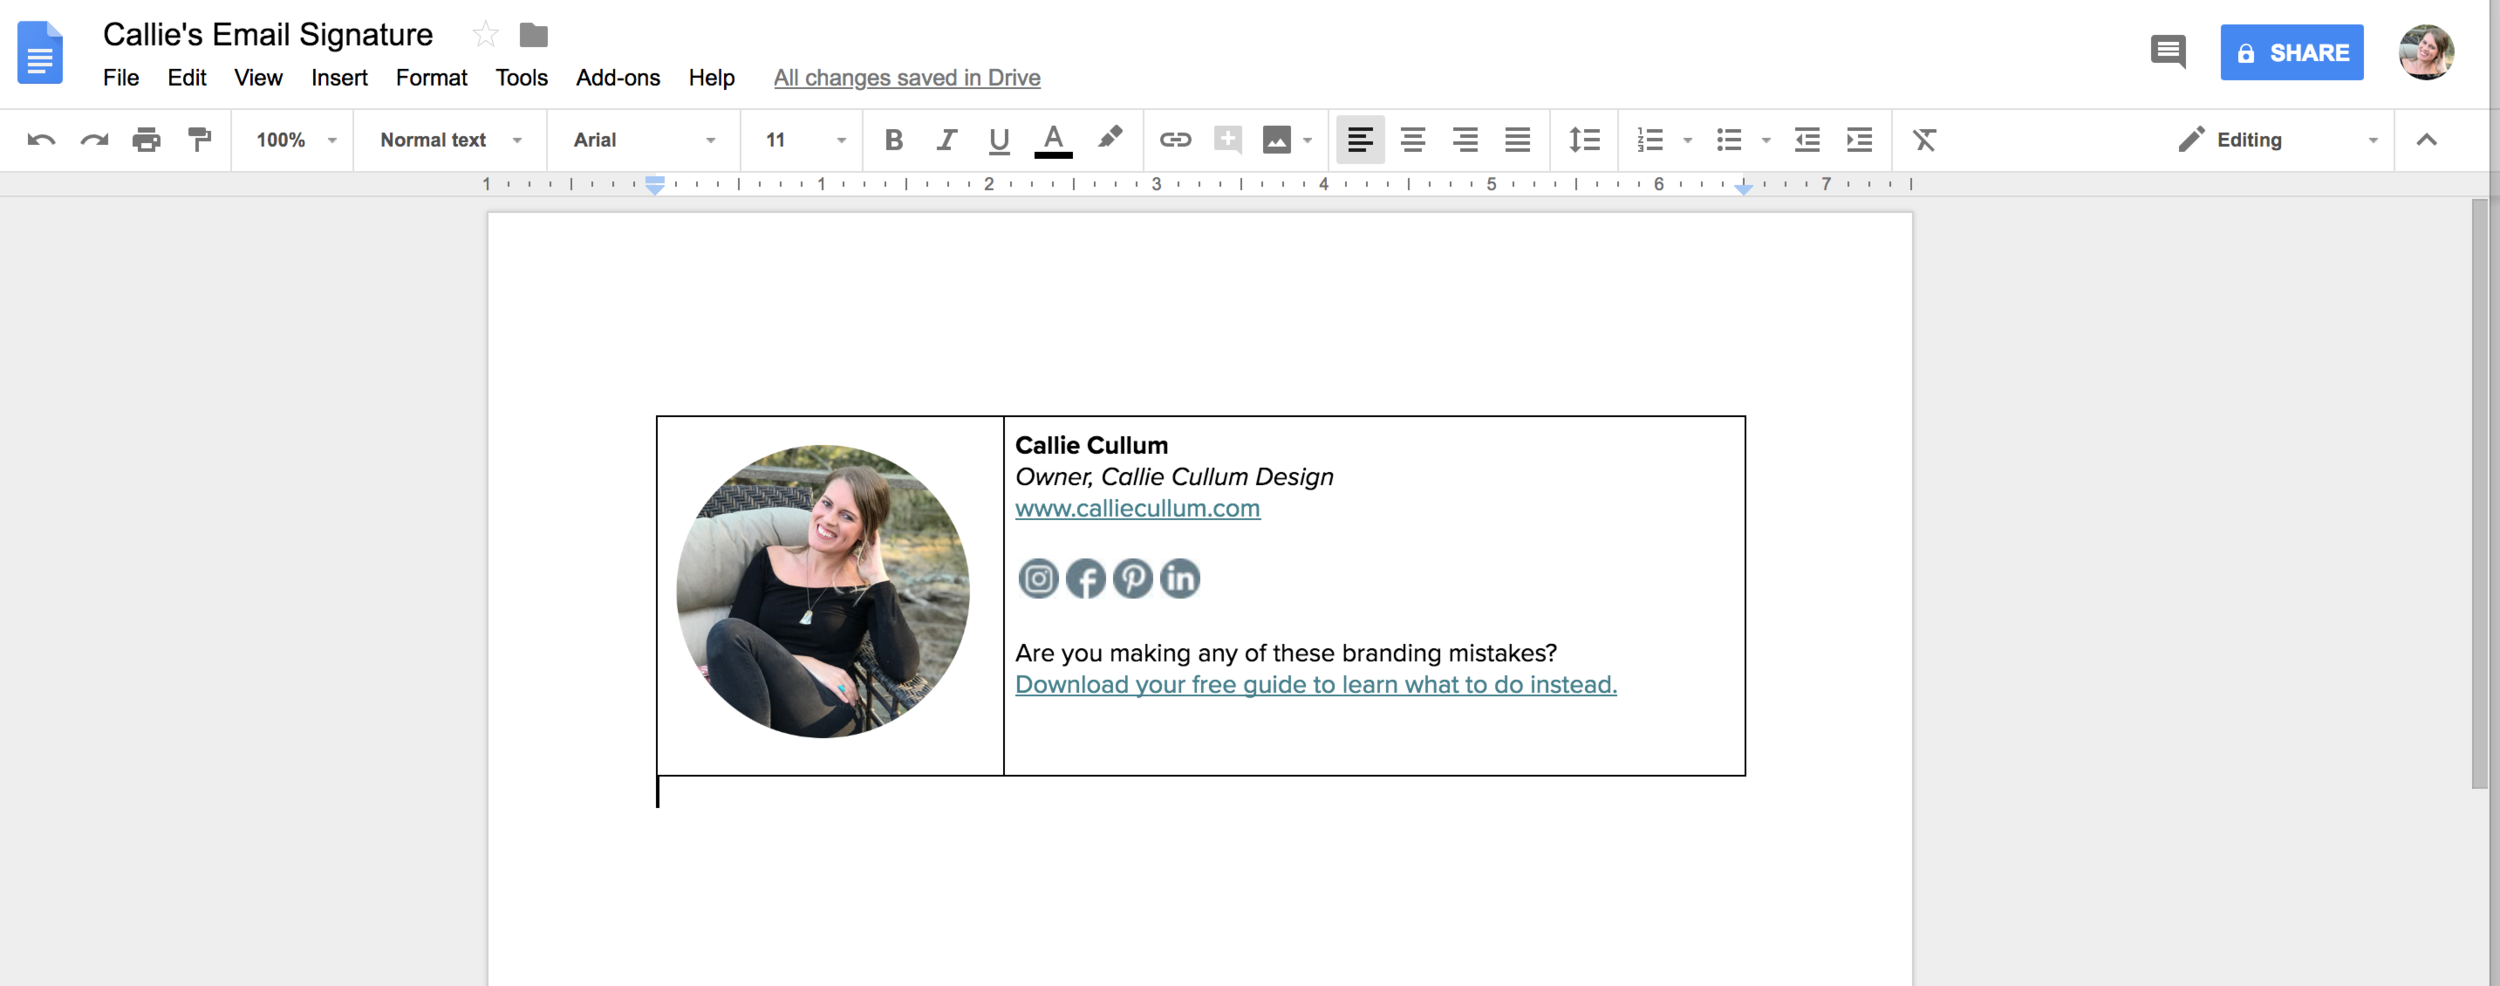
Now we’re at the fun part, designing and laying out your Gmail signature. If you look at my Gmail signature below, you’ll see how I have my headshot on the left, with my contact information on the right.

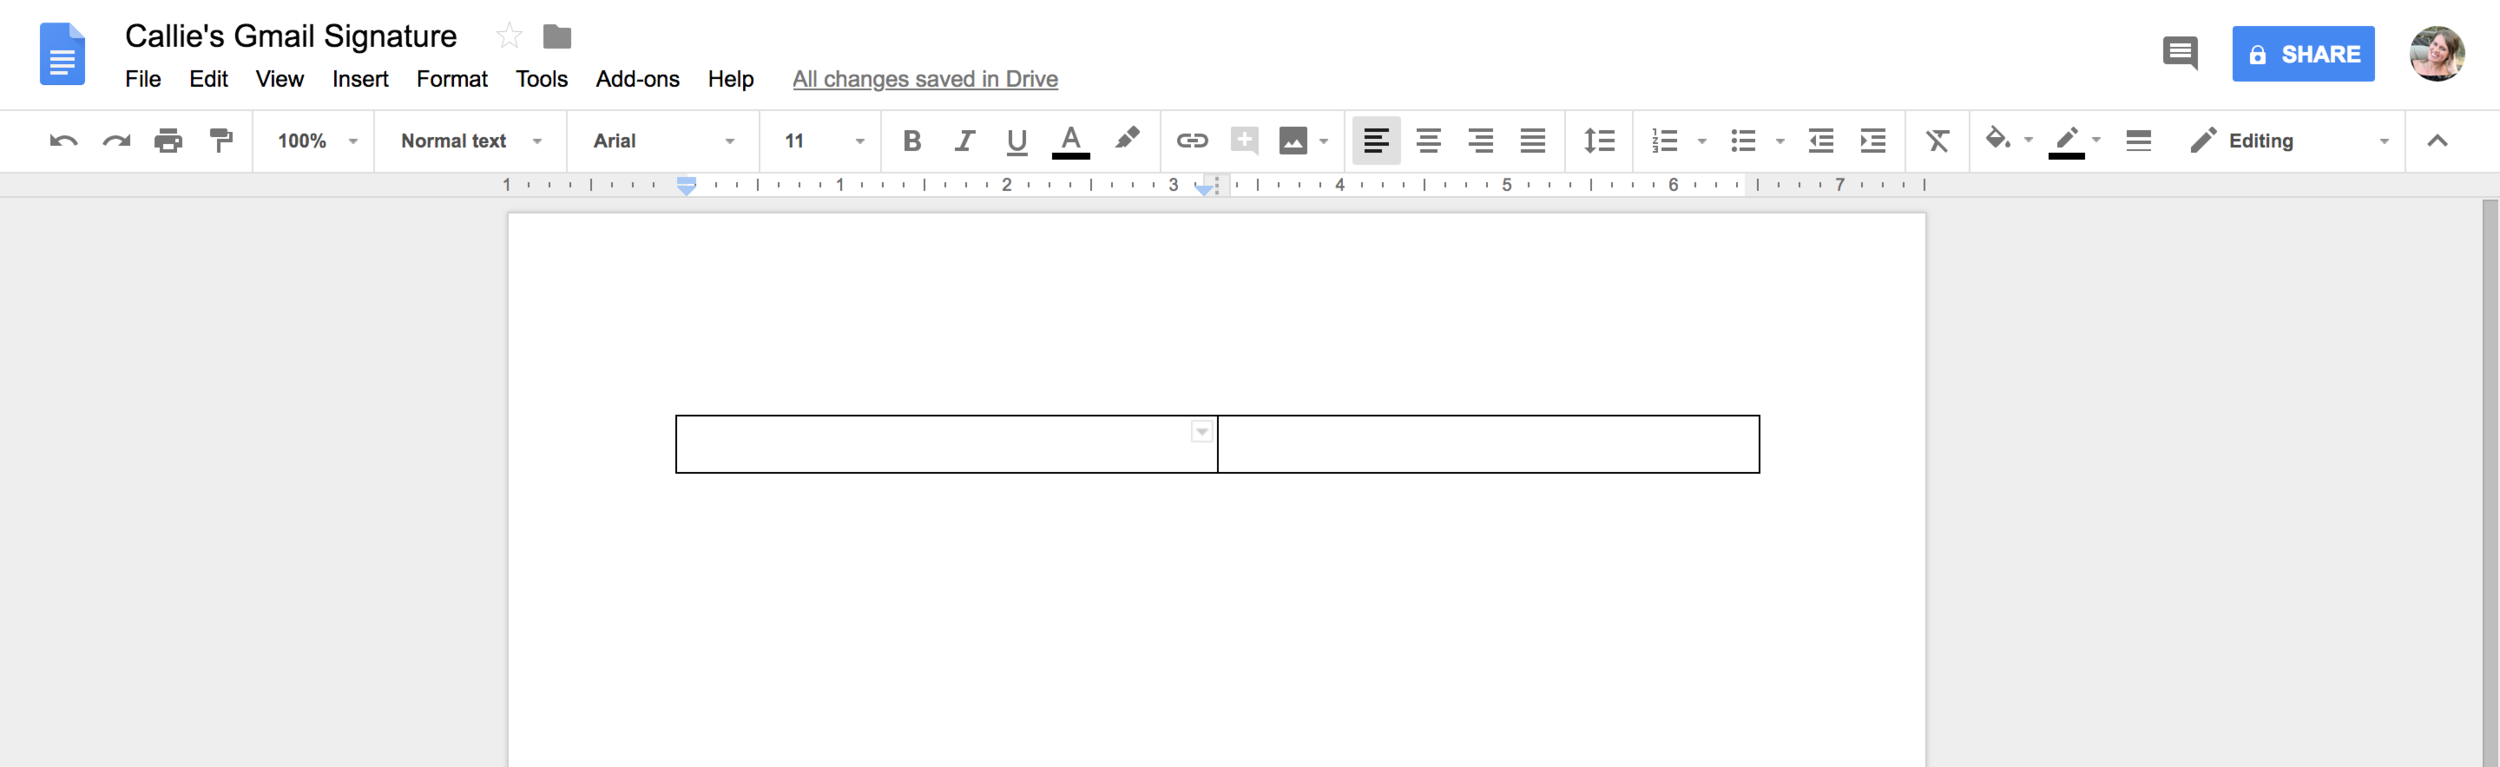
In order to create the columns like this, you’ll need to create a table in your Google doc. To create a table go to Insert>Table and select 2x1. This will create a two column, one-row table. Now your Google Doc should look like this:
Next, click inside the first column, and then head to the image tab in Google Docs. It looks like this:

Upload your headshot or logo here. If your headshot or logo is too large, simply click the image, grab one of the little blue squares in the corner, hold down shift, and resize to your liking. By holding down shift, you ensure that you keep the correct proportions so that your image won’t appear stretched.
Next, click inside the second column to add your text. This would be your contact information, social media icons, or any other information you want to include. I like to include my name, phone number, social media icons, and a link to my opt-in. Get creative here, but again, make sure you keep it simple and straightforward.
To add social media icons, simply follow the same steps above that you used above to add your logo or headshot. Now your email signature should look something like this:
Lastly, you’ll want to remove those table borders. To do that, simply click inside the table, hold down control and click your mouse. When the menu pops up choose Table Properties. When the dialog box pops up, change table border from 1pt to 0pt.
Viola! Now all that’s left to do is add it to your Gmail account.
STEP 4: Add your new signature to your Gmail account
To add your newly designed signature to your Gmail account, head to your email and click the gear icon in the top right corner. Scroll down until you see signature. Once you are there, all you have to do is just literally copy and paste the contents of your Google Doc into the space for your signature, click save, and you’re done!
Creating a professional email signature has never been easier. Now you can send your emails with confidence, and make it extremely simple for people to head to your website, find you on social media or download your opt-in.
One pro-tip I’d like to leave you with is to switch it up every so often! Running a special for the holidays? Just rebranded and have a new website to show off? Really trying to boost engagement for your newsletter? Let people know by alerting them in your email signature. Having your signature saved in a Google Doc makes for easy edits and opportunities to keep others engaged and up to date with all the happenings in and around your business.
Happy branding!

Watch this tutorial on video below.