How to Add a Custom Font in Squarespace Using CSS
Last week I shared a post on how to add custom fonts to your Squarespace website via Adobe Typekit and in that post I promised that I would share with you how to add your font to Squarespace if it’s not in Squarespace’s custom font list or Adobe Typekit.
Well, I’m here to deliver on that promise! Read on below for a step by step guide showing you how to add custom fonts to your Squarespace website through CSS.
First, make sure you have your font file somewhere easily accessible on your computer. Your font will most likely be in one of the following formats: .ttf, .otf, or .woff.
It’s best to use .woff, but any of the file types will work to upload.
Now that you know where your font is on your computer, head to Squarespace and log in to your website. Navigate over to Design > Custom CSS.
Click “Manage Custom Files” in the bottom left of your screen and a pop-up will appear that says “Add Images or Fonts”. Click that and it will prompt you to add your font from your desktop. Once you’ve found it, click Open and you’ll see that it’s added.
For this example, I’m using a font called Oxford and adding it to a test site I’ve created in Squarespace. Below, you’ll see the font now appears in the list.

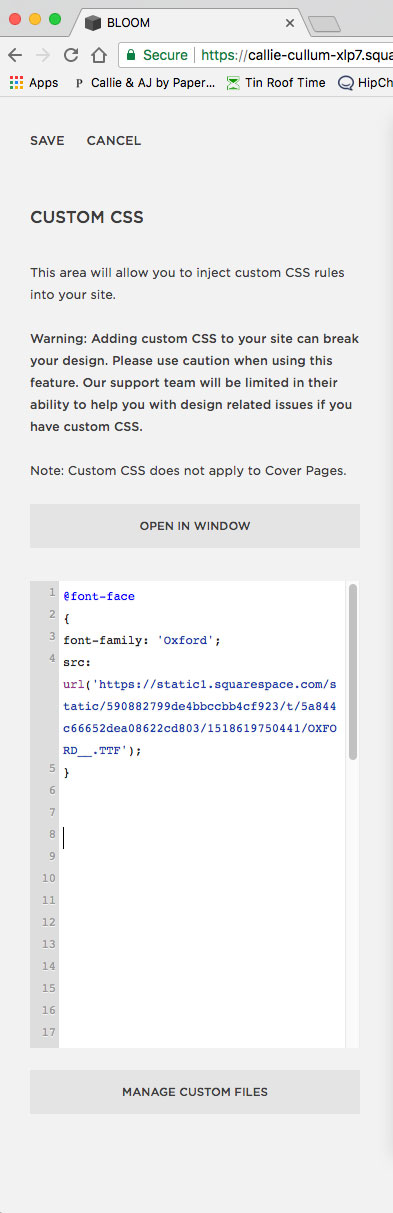
Once you’ve done that, you’ll need a bit of CSS to enable the font to be shown on your website. Copy and paste the CSS below in your custom CSS panel.
@font-face
{
font-family: 'your font name here';
src:url('your font url here');
}
You’ll change “your font name here” to the name of your font and you’ll change the “your font url here” to your font url. (Don’t delete the single quotation around them, that’s important!) To get your font’s url, simply put your cursor where you want to url to populate, then click Manage Custom Files again and simply click your font file. The url will appear where ever your cursor is located in your Custom CSS panel.
In my example it looks like this:
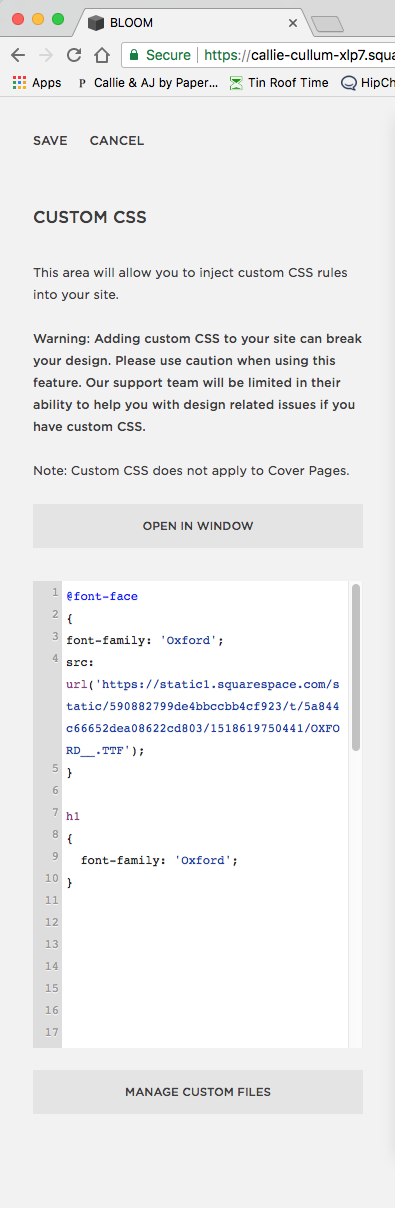
Now your font is added, but how can you use it? You can’t add a font to Squarespace’s font list in the Style Editor, so we have to use a bit more custom CSS to get it to show up.
Determine which heading you want your font to be (h1, h2, h3 or p). The p stands for paragraph and it is your main body text used for paragraphs. For my example I’m going to use h1. So I want all my big, prominent headers to be in the font Oxford on my website.
What you need to do is, copy and paste the CSS below into your custom CSS panel below the code you’ve already pasted.
h1
{
font-family: 'your font name here' !important;
}
Make sure your font name matches exactly what you put in the first snippet of code above. So for this example it would be Oxford. We put the !important tag in there so that the browser knows to choose this font first, and not what is set in the Style Editor.
Now, when you go to your style editor, your heading 1 font should automatically be the new font you just installed.

You can still use the Style Editor to determine the font size, weight, color, and other elements for your font, but it will always display on your website as the custom font you installed.
You can change h2, h3, and p the exact same way, just use h2, h3, or p in the place of h1 in your Custom CSS.
Here’s that code again, just in case you skipped to the bottom here and want to easily grab it:
@font-face
{
font-family: 'your font name here’;
src: url('your font url here');
}
h1
{
font-family: 'your font name here' !important;
}
I hope this guide has been helpful for you! If you don’t have any knowledge of HTML/CSS, it can be daunting, but I promise you that it’s not that hard once you get the hang of it.
If you are having trouble with this, please don’t hesitate to reach out to me, I’d be happy to troubleshoot it for you!
