How to Add Custom Fonts to Squarespace via Adobe Typekit
A lot of my clients who have worked with me for a branding kit, but are DIY-ing their website due to budget constraints ask me how they can use their new beautifully branded typefaces on their Squarespace site. If I’ve chosen a typeface for you that isn’t included in Squarespace’s standard font list and you want to use it on your website, I’ll walk you through how to do that.
There are two ways to do this. First, I’ll show you the easiest way, which is through Adobe Typekit and requires no custom CSS. Stay tuned for the next blog post where I’ll show you how to add a custom font through CSS, in the event your brand typeface isn’t on Squarespace or Adobe Typekit.
Adobe Typekit works with Squarespace to make it easy to sync any fonts from their font collection to your Squarespace website. They offer a free account, as well as a couple paid options, depending on what you are looking for. You can find their pricing structure here.
What you’ll need to do is, first, head over to Typekit and search for your brand fonts, or the font you want to use on your website. You can search by name or style of font if you want to browse around. Once you find it, click on it and your screen should look like this (I’ve chosen a typeface called Acumin):
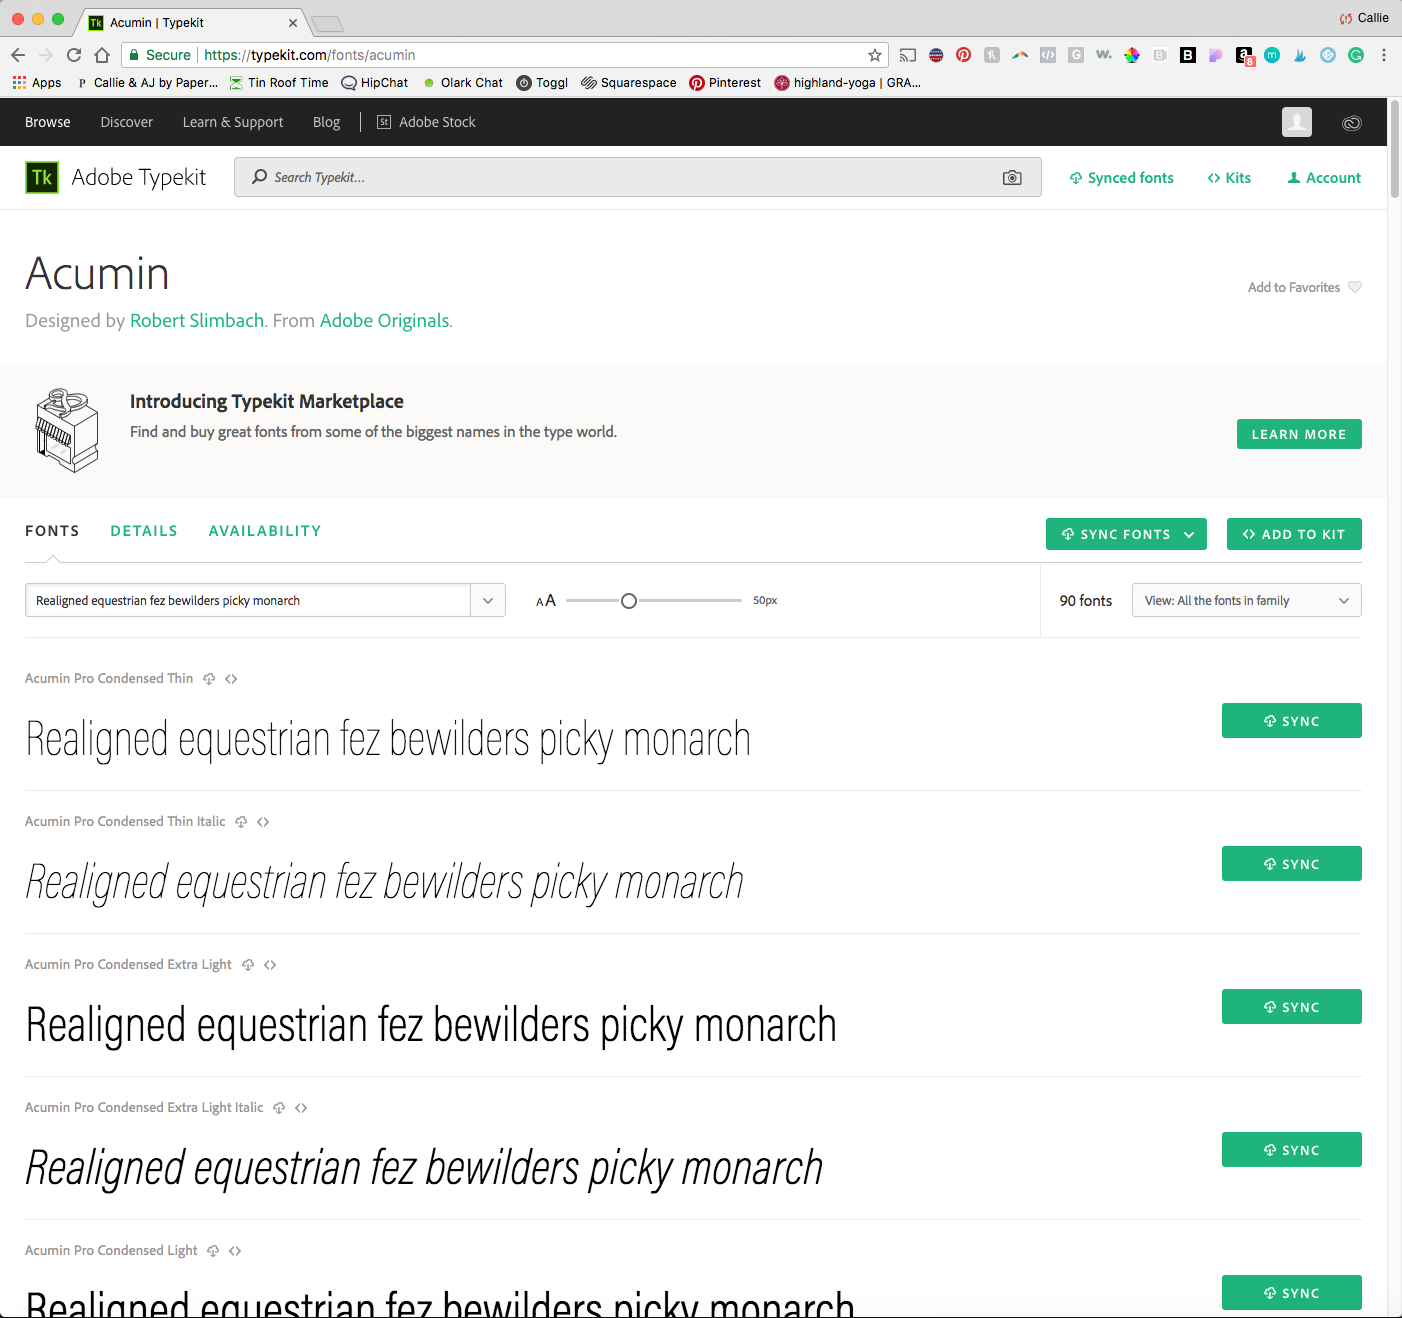
Next, you’ll see the option to Sync (or on some fonts, you’ll see the option to purchase). Sync just means that you’ll be adding it to your computer. This is great to do if you want to use your font in Canva to make social media graphics or other branded materials.
Tip: It’s important to make sure you have the correct license on the fonts you use. If you worked with me to build your brand, I’ll send you a link to purchase your fonts. Some will be free for personal and commercial use, but most won’t. If you see the Sync sign beside your font, you are good to go. If not, you’ll need to purchase the correct license to use your font for business purposes.
Up in the right of the page, you’ll see <> Add to Kit. A kit is what Typekit calls a bundle of fonts on your website. Click Add to Kit and you’ll see a page like this:

You’ll see the option to add your font to an existing kit, or to create a new kit. You’ll most likely need to create a kit, unless you’ve already done this before. You’ll see a pop-up come up once you click create a kit. It’ll look like this:

Where you see Name, type what you want to call this kit. You can call it whatever you want, your business name, your name, etc. I’ve called this one Callie’s Website as an example. Next, you’ll type in the domain you want it added to. If you are wanting to use this on your Squarespace trial site and your actual site, you’ll need to type both domains here separated by a comma. Like this:
www.calliecullum.com, www.calliecullum.squarespace.com
You can type up to ten domains here. Just make sure there are no misspellings, otherwise it won’t work. Once you’ve done that, click Continue.
You’ll see the pop-up change to “Add your embed code”. You don’t need to worry about the code part since Squarespace comes equipped with a plug-in that makes it easier than adding custom code. On that page you’ll see a Typekit ID at the bottom.
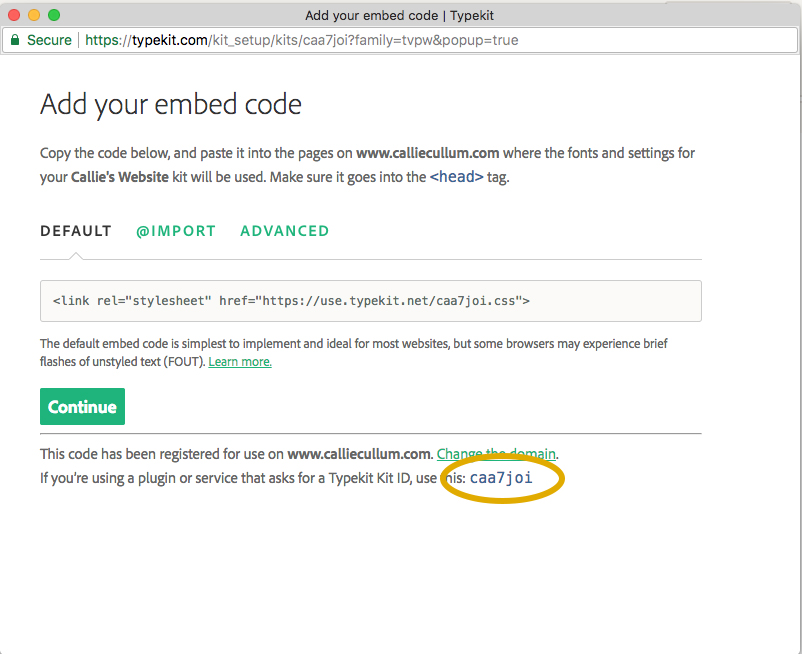
Grab that combination of letters and numbers and click Continue. The next screen will have an option to Publish.
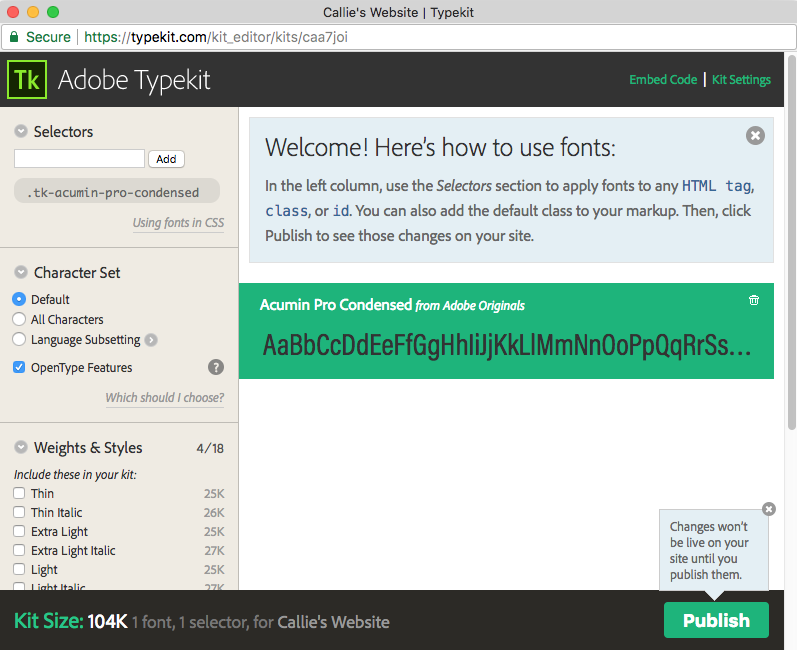
You can choose the different font styles and weights you want to included.
Tip: only include the ones you actually need to use, otherwise you can create unnecessary lag time when loading your site which is not a good look to potential customers.
Make sure you click Publish, otherwise your fonts won’t show up on Squarespace. After you’ve done that and you still have your ID combo, head over to your Squarespace website. Once you are logged in and have selected your website, click Design (on the left hand menu panel). Under Design, click Advanced. Here is where you’ll paste your Adobe Typekit ID.

Once you’ve pasted that in you are finished! You’ll see your font in the Squarespace font list at the top under “Adobe Typekit Fonts”. It make take a few minutes before you can see them, and oftentimes I find that I need to refresh my browser for them to pop-up.
Now you can set your headings to be your specific on-brand fonts! No more feeling like your website has to be off-brand from the rest of your materials due to limited font choices.
Next time I’ll share how to add a custom font when it’s not on Squarespace OR Adobe Typekit. Stay tuned!
In the meantime, let me know how it’s going for you. If you are DIY-ing your site, feel free to reach out with questions. You may also be interested in this Squarespace website e-course BLOOM, a self-study course to help you develop a solid, stylish, and successful website for your brand. It’s affordable and comes with 60 days of unlimited email support!
If you are having trouble with syncing Adobe Typekit fonts to Squarespace just let me know in the comments, or shoot me an email and I’ll help you troubleshoot what’s going wrong.